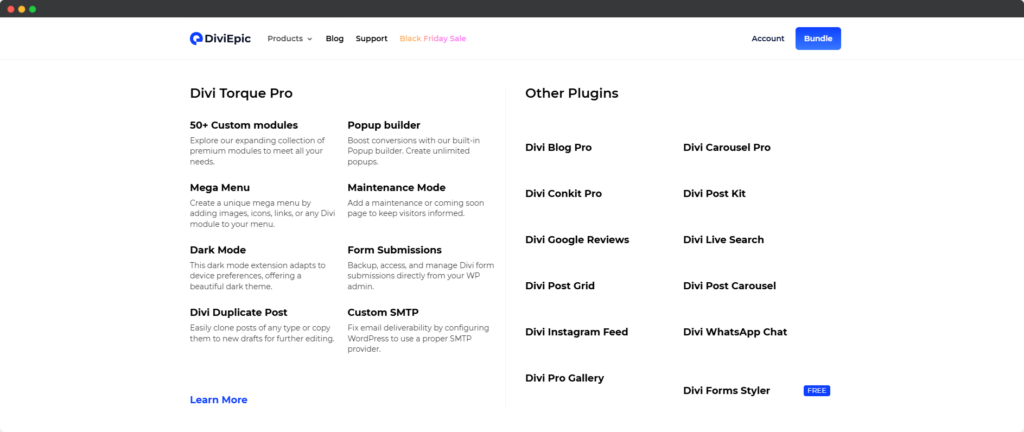
The Divi Megamenu Builder extension for Divi Builder offers a powerful, customizable way to enhance website navigation by creating feature-rich, multi-level menus. This extension allows you to design and implement large, interactive menus that can showcase multiple links, images, and other content, improving site organization and user experience.
With seamless integration into your Divi websites, the Mega Menu provides intuitive navigation, making it easier for visitors to explore your content efficiently and reducing bounce rates. You can create your own customizable menu from the Divi Layout and add any Divi or third-party module and feature to your mega menu. Tailored for various screen sizes, it ensures a responsive, elegant design that enhances both functionality and aesthetics.

Layouts for Mega Menu
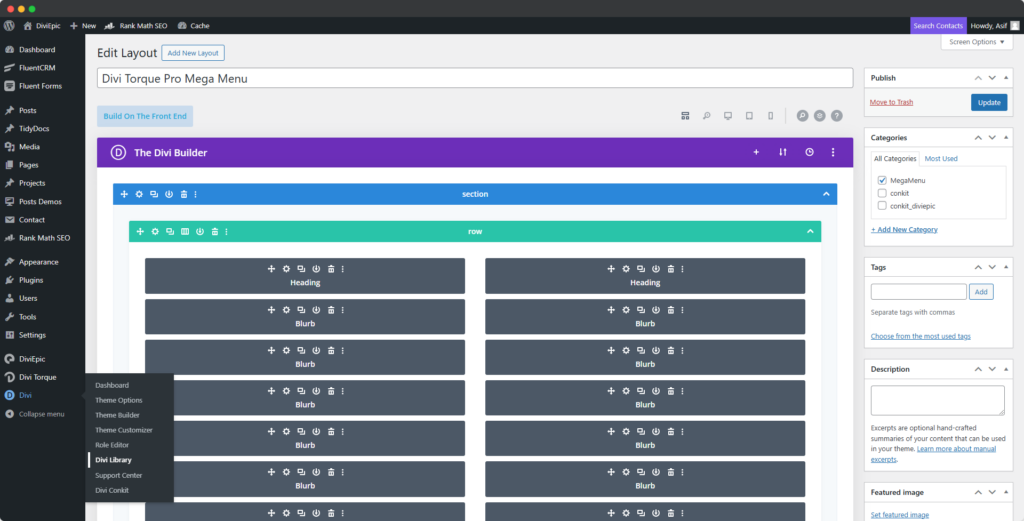
To create a custom Mega Menu design using Divi Layouts, follow these steps: you’ll start by accessing the WordPress dashboard, where you’ll navigate to the Divi Library. Once there, you’ll create a new layout, design it using the Divi Builder, and populate it with various Divi or third-party modules. Finally, you’ll save your layout and assign it to your Mega Menu configuration, ensuring a fully customized and interactive navigation experience that enhances user engagement.

- Navigate to Divi Library – In the left-hand menu, go to Divi > Divi Library. This is where you can manage and create custom layouts.
- Add New Layout – Click the Add New button at the top of the page.
- Name Your Layout – Enter a name for your layout, such as “Mega Menu Design.”
- Select Layout Type – Choose Layout as the type, then click the Submit button.
- Build Your Design – You’ll be redirected to the Divi Builder. Here, you can start creating your custom Mega Menu layout. Add Rows and columns, and include any Divi modules or third-party modules you want, such as images, text, buttons, or icons.
- Save the Layout – Once you’ve finished designing, click Save to store your layout in the Divi Library.
Mega Menu Setup
After designing your Mega Menu layout, follow these steps to assign it to your website’s menu: navigate to the WordPress dashboard, access the Menus section under the Appearance tab, and ensure you select the correct menu for customization. Next, locate the specific menu item where you want the Mega Menu to appear, expand its settings, and assign the custom Divi Layout you created. Finally, save your changes to apply the new Mega Menu design, enhancing your site’s navigation and user experience.

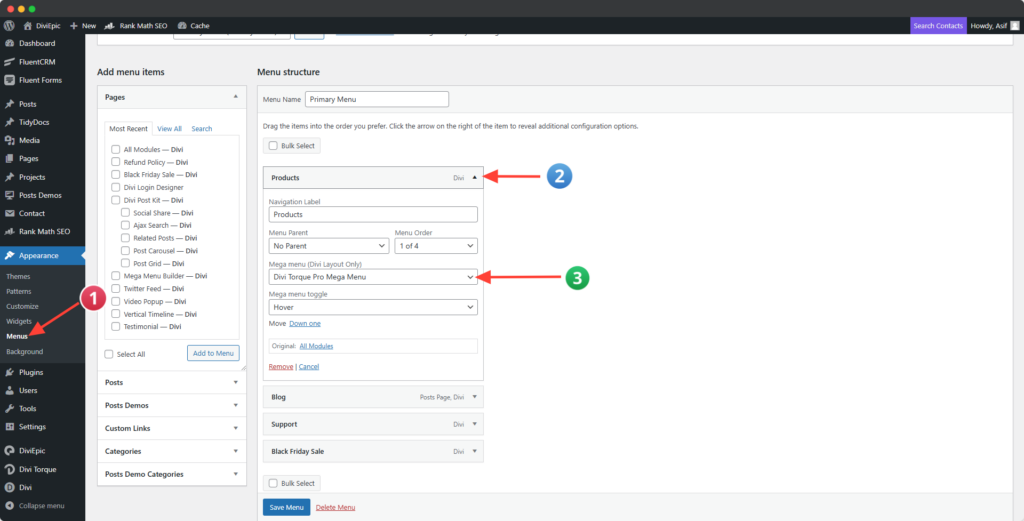
- Go to Appearance > Menus – In your WordPress dashboard, navigate to Appearance > Menus.
- Select the Correct Menu – From the dropdown at the top, choose the menu you want to customize, then click Select.
- Choose the Menu Item – Locate the specific menu item where you want to add the Mega Menu.
- Expand the Menu Item – Click the dropdown icon on the left side of the menu item to expand its options.
- Assign the Mega Menu Layout – From the expanded options, find the setting labeled Mega Menu (Divi Layout Only). Select the Divi Layout you created for the Mega Menu from the dropdown list.
- Save Changes – Click the Save Menu button to apply your changes.